


Polyurea, a spray-applied coating of plastic, is applied using special equipment and training. This article is called "Preparing to Polyurea" as you won't likely be using it yourself. To get the best return on your investment, you'll need to become a polyurea spray applicator. Maintenance and upkeep are also important. It is expensive to leave equipment on its own for too long between jobs. If you would like to know more about the process of applying polyurea to your pond creation, read on and see what you can learn from the 30 years of experience we have applied to this article for you.

Tech Specifications
Polyurea is a two-part product that is delivered to the surface to coat at around 200 degrees Fahrenheit. It can also be applied to surfaces with a special set of heated hoses, pumping equipment, and a sprayer. The pumping system heats the two components (amines & isocyanate) and then transfers them to the spray gun via heated hoses, which can reach several hundred feet long.
After polyurea has been applied, a professional remove the center of a fitting that is flanged. Polyurea can waterproof shapes such as islands and steps, which cannot be achieved with liner.
Many polyurea formulations are available for different applications, including truck bed liners and roofing, decking and blast protection, armor plating, waterproofing and water containment, structural and other protection. Many formulas contain plasticizers which provide the right chemistry for specific applications. Water containment formulas are usually made up of pure polyurea formulas without any plasticizers.
Polyurea can be used in pond construction because it can be applied to almost any shape or structure without wrinkles or folds. It also has an elastic of around 400 percent. Polyurea can support tons upon tons of boulders and roots cannot grow through it.
Underlayment should be laid first before the polyurea is applied. Polyurea can also be used as a surface coating to seal cold joints between sections of concrete or other structural materials, such as islands or piers. These indoor water features are ideal for features that touch or incorporate the foundation of buildings.
Polyurea is not glue! Polyurea has a "Band-Aid stick" that sticks to most surfaces. It must be mechanically clamped to any penetrations just like an EPDM liner. All pond-type skimmers, bottom and mid-water drains, as well as returns, are equipped with liner-compatible clamping flanges. These are ideal for polyurea. The top edges of the top can overlap and be held by the top cap, stone or liner. You can create an edge treatment by putting a ledge around your top. This is similar to a plant ledge that has stacked rocks or boulders hiding and secure the edge.
Polyurea sticks almost to everything. For installations in which tile or vertical stones are to be applied to the surface of a wall or surface, stainless steel lath can be fused to the surface to form a grid surface to allow the mortar to bond.
Designing with Polyurea
The island and waterfall are completed with water and plants.

Polyurea can be applied in multiple passes to reach a thickness of around 80 mils. To get an even coating, the spray gun must be directed at 90 degrees from the surface. Spraying at an angle could cause drips, runs and uneven coatings.

Concrete Prep
The concrete surface should have a "sidewalk finish" when polyurea is applied. To smoothen the concrete surface, you can either trowel it or sand the surface to fill in any gaps, cracks or imperfections. Polyurea will appear like the surface to which it is applied, so you should make sure it looks nice. When applied thin, a product should be very hard and not weak. Parge coatings that have chemical reactions with pinhole and polyurea can cause a lot of trouble. Gray Bond-Kote is my favorite Super-Krete product. Before applying any parge coating, make sure to check with your preferred polyurea applicator.
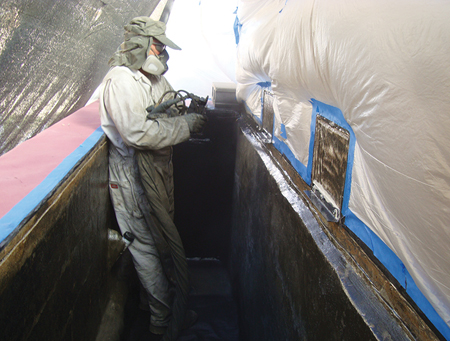
To cover a trough-shaped pond, it takes quite a lot of space
You will need to locate the screw holes in your penetrations to attach the clamp rings. You can place a finishing nail in only one or two of the holes. Leave the rest open. Because polyurea is strong, it can be difficult to fill all the holes with nails. It is easy to cut just one or two nails with a razor blade. Once the first few screws have been in place, the rest of the holes will be indexed through the clamp ring. The screws will easily pass through the poly and into holes in the flange. If the skimmer's face comes with nuts and bolts, or machine screws, place a few screws in the indexing holes and cover the rest with tape or paper dots. Install the faceplate by putting in the first two screws and marking the holes that need to be cut.

Communicate to Get the Best Results
Before the project begins, it is important to keep in touch with your technician. By preparing for polyurea, you will make sure that your project is easy for the technician to coat. If you do your job well, the technician will not charge extra for additional prep time. Be sure to include the prep time in any bid. Let the crew know what you expect of them on shotcrete or gunite ponds. They are used to shooting around protruding pipes that is later cut by the pool plaster crew. Unless you specifically request otherwise, they will assume that you require a rough surface to apply a plaster coat. Ask them if they have some cement finishers to help smoothen the surface and be ready to pay. If they do not have a few cement finishers, you'll need to parge the entire surface after they leave to make it smooth enough for polyurea. This is costly and time-consuming. They will need to prepare the surface for penetrations and nitpick small imperfections.
The project will stay waterproof for longer than any other coating. Once you have used polyurea, you will be able to find projects you can use it on. This will allow you to expand your design capabilities.


No comments:
Post a Comment